How do I verify the functionality of a new digital pressure gauge?
Leave a message
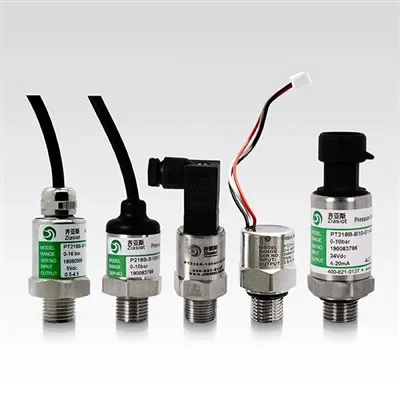
As a supplier of Digital Pressure Gauges, ensuring the functionality and accuracy of these instruments is of utmost importance. In this blog, I'll share the comprehensive process I follow to verify the functionality of a new digital pressure gauge. This process not only guarantees the quality of the products we offer but also builds trust with our customers.
Initial Visual Inspection
The first step in verifying a new digital pressure gauge is a thorough visual inspection. This may seem like a basic step, but it can reveal a lot about the gauge's condition and potential issues. I carefully examine the gauge for any visible damage, such as cracks in the housing, scratches on the display, or loose connections. A damaged housing can compromise the gauge's internal components and lead to inaccurate readings or even complete failure.
I also check the display for any dead pixels or abnormal lighting. A clear and functional display is essential for users to accurately read the pressure values. Additionally, I inspect the connectors and ports to ensure they are clean and free of debris. Loose or dirty connections can cause intermittent signal loss or inaccurate data transmission.
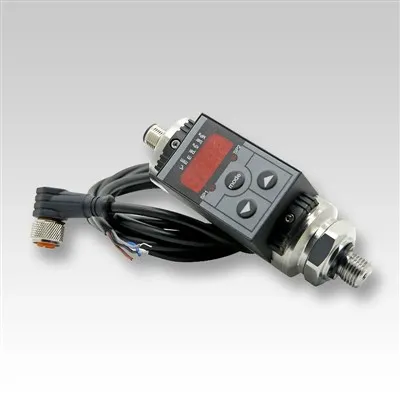
Power On and Self - Test
After the visual inspection, I power on the digital pressure gauge. Most modern digital pressure gauges have a self - test function that runs automatically when the device is turned on. During this self - test, the gauge checks its internal components, such as the sensor, display, and microcontroller, for any malfunctions.
I observe the display during the self - test to see if any error messages are displayed. Error messages can provide valuable information about the specific problem with the gauge. For example, an "Sensor Error" message may indicate a problem with the pressure sensor, while a "Display Error" message could point to an issue with the display module.
If the gauge passes the self - test without any error messages, it's a good sign that the basic functionality of the device is working properly. However, this is just the first step, and further testing is required to ensure accurate pressure measurements.
Calibration Check
Calibration is a crucial aspect of verifying the functionality of a digital pressure gauge. A calibrated gauge provides accurate and reliable pressure measurements, which are essential in many applications, such as industrial processes, laboratory experiments, and medical devices.
To check the calibration of the new digital pressure gauge, I use a reference pressure source. A reference pressure source is a highly accurate device that can generate a known and stable pressure. There are different types of reference pressure sources available, such as deadweight testers and pressure calibrators.
I connect the digital pressure gauge to the reference pressure source and apply a series of known pressures. I compare the readings on the digital pressure gauge with the known pressures generated by the reference source. The difference between the gauge reading and the known pressure is called the measurement error.
According to industry standards, the measurement error of a digital pressure gauge should be within a certain tolerance range. For example, in some applications, the tolerance range may be ± 0.1% of the full - scale reading. If the measurement error of the gauge is within the acceptable tolerance range, the gauge is considered to be properly calibrated.
Response Time Test
The response time of a digital pressure gauge is another important parameter to verify. The response time refers to the time it takes for the gauge to reach a stable reading after a change in pressure. In applications where rapid pressure changes occur, such as in hydraulic systems or pneumatic control systems, a fast response time is essential.
To test the response time of the digital pressure gauge, I use a pressure step input. I apply a sudden change in pressure to the gauge and record the time it takes for the gauge reading to reach a stable value within a certain percentage (usually 90% or 95%) of the final pressure.
A slow response time can indicate a problem with the gauge's sensor or signal processing circuitry. If the response time of the gauge is outside the specified range, it may need to be adjusted or repaired.
Stability Test
The stability of a digital pressure gauge is also crucial for accurate and reliable measurements. A stable gauge provides consistent readings over time, even when the environmental conditions change.
To test the stability of the new digital pressure gauge, I place it in a controlled environment and apply a constant pressure for an extended period of time. I monitor the gauge readings at regular intervals and record any changes in the readings.
A significant change in the gauge readings over time may indicate a problem with the gauge's sensor drift or internal components. Sensor drift is a common issue in pressure gauges, which can be caused by factors such as temperature changes, aging of the sensor, and mechanical stress.
Environmental Testing
Digital pressure gauges are often used in various environmental conditions, such as high temperatures, high humidity, and corrosive environments. Therefore, it's important to test the gauge's functionality under different environmental conditions.


I conduct environmental tests, such as temperature tests and humidity tests, to ensure that the digital pressure gauge can operate properly in harsh environments. In a temperature test, I place the gauge in a temperature - controlled chamber and expose it to a range of temperatures from the minimum to the maximum operating temperature specified by the manufacturer.
I monitor the gauge readings during the temperature test to see if the temperature changes affect the accuracy of the measurements. Similarly, in a humidity test, I expose the gauge to high humidity levels and check for any signs of moisture damage or malfunction.
Communication and Interface Testing
Many digital pressure gauges are equipped with communication interfaces, such as USB, RS - 232, or Bluetooth, to allow for data transfer and remote monitoring. I test the communication and interface functionality of the new digital pressure gauge to ensure that it can communicate effectively with other devices.
I connect the gauge to a computer or a data logger using the appropriate communication cable or wireless connection. I then use software to send commands to the gauge and receive data from it. I check if the data is transferred accurately and if the commands are executed correctly.
Conclusion
Verifying the functionality of a new digital pressure gauge is a multi - step process that requires careful attention to detail. By following the steps outlined above, including visual inspection, self - test, calibration check, response time test, stability test, environmental testing, and communication and interface testing, I can ensure that the digital pressure gauges we supply are of high quality and provide accurate and reliable pressure measurements.
If you are in the market for high - quality digital pressure gauges, such as Vacuum Digital Pressure Gauge, Digital Melt Presssure Gauges, or High Temperature Mechanical Melt Presssure Gauges, please feel free to contact us for more information and to discuss your specific requirements. We are committed to providing the best products and services to our customers.
References
- ASME PTC 19.2 - 2018, Pressure Measurement
- ISO 376:2011, Metallic materials - Calibration of force - proving instruments used for the verification of uniaxial testing machines
- ASTM E456 - 15, Standard Terminology Relating to Quality and Statistics