How to install a turbine flowmeter?
Leave a message
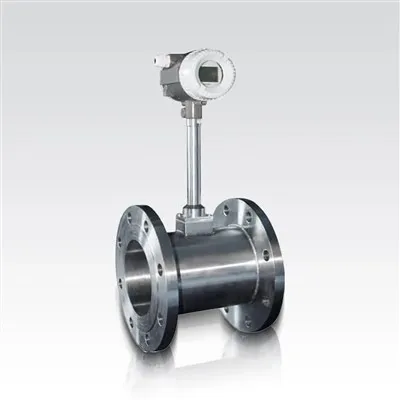
A turbine flowmeter is a reliable and accurate device used to measure the flow rate of liquids and gases in various industrial applications. As a leading Turbine Flowmeters supplier, we understand the importance of proper installation to ensure the optimal performance of these meters. In this blog post, we will guide you through the step-by-step process of installing a turbine flowmeter.
Step 1: Preparation
Before you start the installation process, it is crucial to gather all the necessary tools and materials. You will need a set of wrenches, pipe cutters, Teflon tape, a pressure gauge, and a flowmeter mounting kit. Additionally, make sure you have the turbine flowmeter itself, along with all the required accessories such as gaskets and adapters.
Inspect the turbine flowmeter for any visible damage or defects. Check the documentation provided by the manufacturer to ensure that you have the correct model and specifications for your application. It is also important to familiarize yourself with the installation instructions and safety precautions.
Step 2: Select the Installation Location
Choosing the right location for the turbine flowmeter is essential for accurate measurement. The flowmeter should be installed in a straight section of the pipe, away from any elbows, valves, or other flow disturbances. This will ensure a uniform flow profile and minimize the impact of turbulence on the measurement.
The recommended straight pipe length upstream and downstream of the flowmeter depends on the specific model and application. Generally, a minimum of 10 to 20 pipe diameters upstream and 5 to 10 pipe diameters downstream is required. Refer to the manufacturer's guidelines for the exact requirements.
Step 3: Prepare the Pipe
Once you have selected the installation location, you need to prepare the pipe for the flowmeter installation. Start by cleaning the inside of the pipe to remove any dirt, debris, or rust. This will prevent these contaminants from entering the flowmeter and causing damage.
Next, measure and cut the pipe to the appropriate length using a pipe cutter. Make sure the cut is clean and straight. Deburr the edges of the pipe to prevent any sharp edges from damaging the gaskets or the flowmeter.
Step 4: Install the Flowmeter
Now it's time to install the turbine flowmeter. Begin by applying Teflon tape to the threads of the flowmeter connections. This will create a tight seal and prevent any leaks.
Carefully insert the flowmeter into the pipe, aligning it with the pipe axis. Make sure the flow direction arrow on the flowmeter matches the direction of the fluid flow. Use a wrench to tighten the connections, but be careful not to overtighten as this can damage the flowmeter or the pipe.
Install the gaskets between the flowmeter and the pipe flanges or fittings. Make sure the gaskets are properly seated and aligned. Tighten the bolts or nuts evenly to ensure a uniform seal.
Step 5: Connect the Wiring
After installing the flowmeter, you need to connect the wiring. Most turbine flowmeters come with a signal output cable that needs to be connected to a control panel or a data acquisition system.
Follow the wiring diagram provided by the manufacturer to ensure the correct connection. Make sure all the connections are secure and insulated to prevent any electrical interference or short circuits.
Step 6: Pressure and Flow Testing
Once the flowmeter is installed and the wiring is connected, it is important to perform pressure and flow testing to ensure the proper operation of the flowmeter. Start by slowly opening the valves to allow the fluid to flow through the flowmeter.
Monitor the pressure gauge to ensure that the pressure is within the specified range for the flowmeter. Check the flow rate reading on the control panel or the data acquisition system and compare it with the expected flow rate.
If you notice any abnormal readings or leaks, shut off the flow immediately and check the installation for any issues. Make the necessary adjustments or repairs before proceeding with the testing.
Step 7: Calibration and Commissioning
After the pressure and flow testing is successful, the turbine flowmeter needs to be calibrated and commissioned. Calibration is the process of adjusting the flowmeter to ensure accurate measurement. This is typically done using a calibration device or a reference flow meter.
Follow the manufacturer's instructions for the calibration process. It may involve adjusting the zero point, span, or other parameters of the flowmeter. Once the calibration is complete, the flowmeter is ready for normal operation.
Step 8: Maintenance and Troubleshooting
Regular maintenance is essential to ensure the long-term performance and reliability of the turbine flowmeter. This includes cleaning the flowmeter, checking the wiring connections, and inspecting the gaskets and seals for any signs of wear or damage.
If you encounter any problems with the flowmeter, such as inaccurate readings or leaks, refer to the manufacturer's troubleshooting guide. It may provide solutions to common problems or instructions on how to contact the technical support team for further assistance.
In conclusion, installing a turbine flowmeter requires careful planning, preparation, and attention to detail. By following the steps outlined in this blog post, you can ensure a successful installation and optimal performance of the flowmeter.
If you are in the market for a high-quality turbine flowmeter, we invite you to explore our range of Turbine Flow Meter. Our flowmeters are designed to provide accurate and reliable measurement in a wide range of applications. We also offer other types of flowmeters, such as LDG Electromagnetic Flowmeter and Vortex Flowmeter.
If you have any questions or would like to discuss your specific requirements, please feel free to contact us. Our team of experts is ready to assist you in finding the right flowmeter solution for your needs.


References
- Manufacturer's installation and operation manuals for turbine flowmeters.
- Industry standards and guidelines for flowmeter installation and calibration.