
How to calibrate a Compact Pressure Transmitter?
Leave a message

Calibrating a compact pressure transmitter is a crucial process that ensures accurate and reliable pressure measurements. As a leading supplier of compact pressure transmitters, we understand the importance of proper calibration in maintaining the performance and longevity of these devices. In this blog post, we will guide you through the step-by-step process of calibrating a compact pressure transmitter, providing you with the knowledge and tools to achieve precise measurements.
Understanding the Basics of Pressure Transmitters
Before diving into the calibration process, it's essential to have a basic understanding of how compact pressure transmitters work. A pressure transmitter is a device that converts pressure into an electrical signal, typically a 4-20 mA current loop or a digital output. These signals can then be transmitted to a control system or display for monitoring and analysis.
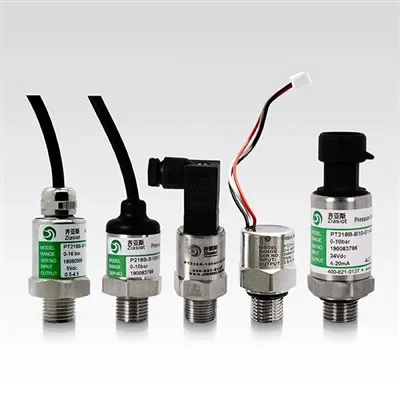
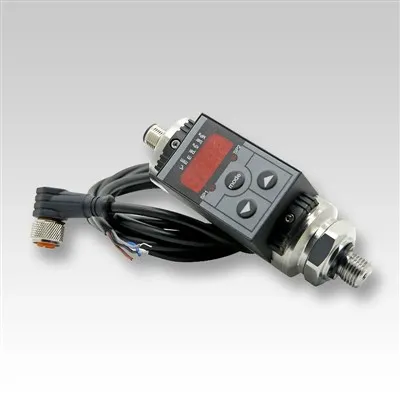
Compact pressure transmitters are designed to be small, lightweight, and highly accurate, making them ideal for a wide range of applications, including industrial automation, HVAC systems, and process control. They are available in various types, such as Pressure Indicator Transmitter, Explosion Proof Digital Silicon Pressure Transmitter, and Sanitary Flat-Diaphragm Digital Pressure Transmitter, each tailored to specific industry requirements.
Why Calibration is Necessary
Over time, pressure transmitters can experience drift or inaccuracies due to factors such as temperature changes, mechanical stress, and component aging. Calibration is the process of adjusting the transmitter's output to match a known reference pressure, ensuring that it provides accurate and consistent measurements. Regular calibration not only improves the performance of the pressure transmitter but also helps to prevent costly downtime and maintenance issues.


Step-by-Step Guide to Calibrating a Compact Pressure Transmitter
Step 1: Gather the Necessary Tools
Before you begin the calibration process, you will need to gather the following tools:
- A pressure calibration device: This can be a deadweight tester, a pressure controller, or a pressure calibrator. Make sure the calibration device is accurate and has a sufficient range to cover the operating pressure of the transmitter.
- A multimeter: This is used to measure the electrical output of the pressure transmitter.
- A set of wrenches: These are used to connect and disconnect the pressure lines and electrical cables.
- A data logger or a computer with calibration software: This is optional but can be useful for recording and analyzing the calibration data.
Step 2: Prepare the Pressure Transmitter
- Isolate the transmitter: Turn off the power supply to the pressure transmitter and isolate it from the process by closing the isolation valves.
- Remove the protective cover: If the transmitter has a protective cover, remove it to access the calibration ports and electrical connections.
- Check the physical condition: Inspect the transmitter for any signs of damage or wear, such as cracks, leaks, or loose connections. If you find any issues, repair or replace the transmitter before proceeding with the calibration.
Step 3: Connect the Calibration Device
- Connect the pressure lines: Use the appropriate wrenches to connect the pressure lines from the calibration device to the pressure ports of the transmitter. Make sure the connections are tight and leak-free.
- Connect the electrical cables: Connect the electrical cables from the multimeter to the output terminals of the transmitter. Make sure the polarity is correct.
Step 4: Zero the Transmitter
- Apply zero pressure: Use the calibration device to apply zero pressure to the transmitter. This can be done by opening the vent valve or by using a vacuum pump.
- Adjust the zero output: Use the zero adjustment potentiometer or the digital interface of the transmitter to adjust the output signal to the specified zero value. This value is typically 4 mA for a 4-20 mA current loop output.
- Verify the zero output: Use the multimeter to measure the output signal of the transmitter and verify that it is within the specified tolerance. If the output signal is not within the tolerance, repeat the zero adjustment process until it is.
Step 5: Span the Transmitter
- Apply full-scale pressure: Use the calibration device to apply the full-scale pressure to the transmitter. This value is typically the maximum pressure rating of the transmitter.
- Adjust the span output: Use the span adjustment potentiometer or the digital interface of the transmitter to adjust the output signal to the specified full-scale value. This value is typically 20 mA for a 4-20 mA current loop output.
- Verify the span output: Use the multimeter to measure the output signal of the transmitter and verify that it is within the specified tolerance. If the output signal is not within the tolerance, repeat the span adjustment process until it is.
Step 6: Perform Intermediate Point Calibration
- Apply intermediate pressures: Use the calibration device to apply a series of intermediate pressures between zero and full-scale pressure. The number and spacing of the intermediate points will depend on the accuracy requirements of the application.
- Record the output signals: Use the multimeter to measure the output signals of the transmitter at each intermediate pressure point and record the values.
- Calculate the error: Calculate the error between the measured output signals and the expected output signals at each intermediate pressure point. The error should be within the specified tolerance.
- Adjust the transmitter if necessary: If the error is outside the specified tolerance, adjust the transmitter using the zero and span adjustment potentiometers or the digital interface until the error is within the tolerance.
Step 7: Repeat the Calibration Process
- Repeat steps 4-6: Repeat the zero, span, and intermediate point calibration steps at least two more times to ensure the accuracy and repeatability of the calibration.
- Record the calibration data: Record the calibration data, including the pressure values, the output signals, and the calculated errors, for each calibration run. This data can be used for future reference and to demonstrate compliance with industry standards.
Step 8: Reinstall the Protective Cover and Restore the Process
- Reinstall the protective cover: Once the calibration is complete, reinstall the protective cover on the transmitter.
- Restore the process: Open the isolation valves and turn on the power supply to the pressure transmitter to restore the process.
- Verify the operation: Monitor the output signal of the transmitter and verify that it is within the expected range. If the output signal is not within the expected range, repeat the calibration process or check for any issues with the process or the transmitter.
Tips for Successful Calibration
- Follow the manufacturer's instructions: Always refer to the manufacturer's calibration instructions and specifications for your specific pressure transmitter. These instructions will provide you with the detailed steps and procedures for calibrating the transmitter.
- Use a calibrated calibration device: Make sure the calibration device you use is calibrated and traceable to a national or international standard. This will ensure the accuracy and reliability of the calibration results.
- Perform the calibration in a stable environment: Calibrate the pressure transmitter in a stable environment with a constant temperature and humidity. Avoid calibrating the transmitter in a noisy or vibrating environment, as this can affect the accuracy of the calibration.
- Document the calibration process: Keep a detailed record of the calibration process, including the date, time, calibration device used, calibration results, and any adjustments made. This documentation will help you to demonstrate compliance with industry standards and to track the performance of the pressure transmitter over time.
Conclusion
Calibrating a compact pressure transmitter is a critical process that ensures accurate and reliable pressure measurements. By following the step-by-step guide outlined in this blog post, you can calibrate your pressure transmitter with confidence and achieve precise measurements. As a leading supplier of compact pressure transmitters, we are committed to providing our customers with high-quality products and excellent technical support. If you have any questions or need assistance with calibrating your pressure transmitter, please contact us for more information.
References
- ASME PTC 19.2-2018, Pressure Measurement
- ISO 17025:2017, General requirements for the competence of testing and calibration laboratories
- Manufacturer's calibration instructions and specifications for compact pressure transmitters