
How to calibrate a Homogenizer Pressure Gauge without special equipment?
Leave a message

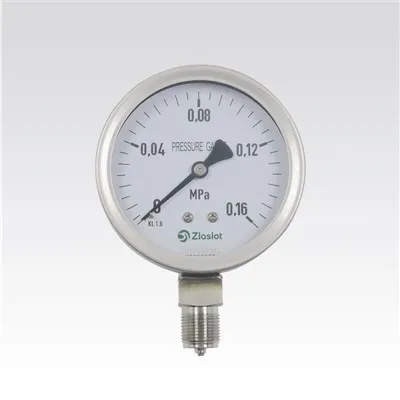
Calibrating a homogenizer pressure gauge is a crucial task to ensure accurate pressure readings, which are essential for the proper functioning of homogenizers in various industries such as food, pharmaceutical, and biotechnology. While special calibration equipment is commonly used for this purpose, there are methods to calibrate a homogenizer pressure gauge without such specialized tools. As a supplier of homogenizer pressure gauges, I will share some practical and cost - effective ways to perform this calibration.
Understanding the Basics of Homogenizer Pressure Gauges
Before diving into the calibration process, it's important to understand how homogenizer pressure gauges work. These gauges measure the pressure within the homogenizer, which is vital for achieving consistent product quality. Homogenizers operate by forcing a liquid through a narrow gap at high pressure, and the pressure gauge provides real - time feedback on this process.
There are different types of homogenizer pressure gauges available in the market. For instance, High Temperature Mechanical Melt Presssure Gauges are designed to withstand high temperatures during the homogenization process, making them suitable for applications where heat is generated. Digital Melt Presssure Gauges offer more precise readings and can be easily integrated with digital control systems. And Vacuum Digital Pressure Gauge is useful when dealing with vacuum - related homogenization processes.
Pre - calibration Checks
Before attempting to calibrate the pressure gauge, a series of pre - calibration checks should be carried out. First, visually inspect the gauge for any signs of damage, such as a cracked glass face, bent needle, or loose fittings. A damaged gauge may not provide accurate readings and could potentially lead to incorrect calibration.
Next, check the connections of the gauge to the homogenizer. Ensure that all fittings are tight and there are no leaks. A leak can cause inaccurate pressure readings and affect the calibration process. It's also a good idea to clean the gauge and its connections to remove any dirt or debris that could interfere with its operation.
Calibration Method 1: Using a Reference Pressure Source
One of the most common ways to calibrate a pressure gauge without special equipment is by using a reference pressure source. A simple reference pressure source can be created using a known weight and a piston - cylinder arrangement.
First, you need to find a piston - cylinder setup with a known cross - sectional area. The piston should fit snugly into the cylinder to prevent any leakage. Place a known weight on top of the piston. The pressure exerted on the piston can be calculated using the formula (P=\frac{F}{A}), where (P) is the pressure, (F) is the force (equal to the weight of the object in Newtons, calculated as (F = m\times g), with (m) being the mass in kilograms and (g) being the acceleration due to gravity, approximately (9.81m/s^{2})), and (A) is the cross - sectional area of the piston in square meters.


Connect the reference pressure source to the homogenizer pressure gauge using appropriate tubing. Make sure the connections are tight. As the pressure is applied from the reference source, observe the reading on the pressure gauge. Compare the reading on the gauge with the calculated pressure from the reference source. If there is a difference, adjust the calibration screw on the pressure gauge until the reading on the gauge matches the calculated pressure.
Calibration Method 2: Comparison with a Known Good Gauge
Another method is to compare the homogenizer pressure gauge to be calibrated with a known good gauge. This known good gauge should have been recently calibrated using proper calibration equipment and should be of the same type and range as the gauge to be calibrated.
Connect both gauges to the same pressure point on the homogenizer. Start the homogenizer and gradually increase the pressure. Observe the readings on both gauges simultaneously. If the readings differ, note the difference at various pressure levels. Adjust the calibration of the gauge to be calibrated until its readings match those of the known good gauge.
Step - by - Step Calibration Process
- Initial Setup: Ensure that the homogenizer is turned off and depressurized. Connect the necessary equipment for the chosen calibration method (either the reference pressure source or the known good gauge).
- Zero Calibration: With no pressure applied, check the reading on the pressure gauge. It should read zero. If it does not, use the zero - adjustment screw on the gauge to set the reading to zero.
- Pressure Application: Apply pressure to the gauge using the reference pressure source or by running the homogenizer. Start with a low pressure and gradually increase it to different pressure levels within the gauge's range.
- Reading Comparison and Adjustment: At each pressure level, compare the reading on the gauge to be calibrated with the calculated pressure (from the reference source) or the reading on the known good gauge. If there is a deviation, use the calibration screw on the gauge to adjust the reading. Make small adjustments and re - check the reading until the desired accuracy is achieved.
- Final Checks: After completing the calibration at all pressure levels, re - check the zero reading of the gauge. Also, check the readings at a few intermediate pressure levels to ensure the calibration is consistent.
Troubleshooting during Calibration
During the calibration process, you may encounter some issues. If the gauge reading does not change when pressure is applied, it could be due to a blocked or damaged pressure passage. Check the tubing and connections for any blockages and clean or replace them if necessary.
If the gauge reading fluctuates wildly, there may be a problem with the internal mechanism of the gauge. In this case, it may be necessary to disassemble the gauge carefully (following the manufacturer's instructions) and check for any loose or damaged parts.
Importance of Regular Calibration
Regular calibration of homogenizer pressure gauges is essential for maintaining the quality and safety of the homogenization process. Inaccurate pressure readings can lead to inconsistent product quality, such as uneven particle size distribution in food products or ineffective drug formulation in the pharmaceutical industry.
Calibration also helps in ensuring the safety of the equipment and the operators. Over - pressurization due to an inaccurate gauge can cause equipment failure, which may result in costly repairs and pose a safety hazard to the operators.
Conclusion
Calibrating a homogenizer pressure gauge without special equipment is possible using the methods described above. As a supplier of homogenizer pressure gauges, I understand the importance of accurate calibration for the proper functioning of your homogenization processes. Whether you choose to use a reference pressure source or compare with a known good gauge, following the steps carefully can help you achieve accurate pressure readings.
If you are in need of high - quality homogenizer pressure gauges or have any questions regarding calibration, we are here to assist you. Contact us to discuss your specific requirements and start a procurement negotiation. We offer a wide range of pressure gauges, including High Temperature Mechanical Melt Presssure Gauges, Digital Melt Presssure Gauges, and Vacuum Digital Pressure Gauge, to meet your diverse needs.
References
- ASME PTC 19.2 - 2018, Pressure Measurement.
- ISO 10012:2003, Measurement management systems - Requirements for measurement processes and measuring equipment.
- Manufacturer's manuals for homogenizer pressure gauges.