
How do I install a pressure gauge on a hydraulic cylinder?
Leave a message

Hey there! I'm a supplier of Pressure Gauges, and today I'm gonna walk you through the process of installing a pressure gauge on a hydraulic cylinder. It might seem a bit tricky at first, but with the right steps, you'll get it done in no time.
Why Install a Pressure Gauge on a Hydraulic Cylinder?
Before we jump into the installation process, let's quickly talk about why you'd want to install a pressure gauge on a hydraulic cylinder. Hydraulic systems operate under high pressures, and knowing the exact pressure within the cylinder is crucial. It helps in monitoring the system's performance, detecting any potential issues early on, and ensuring the safety of the entire operation. A pressure gauge gives you real - time information about the pressure, allowing you to make adjustments as needed.


Tools and Materials You'll Need
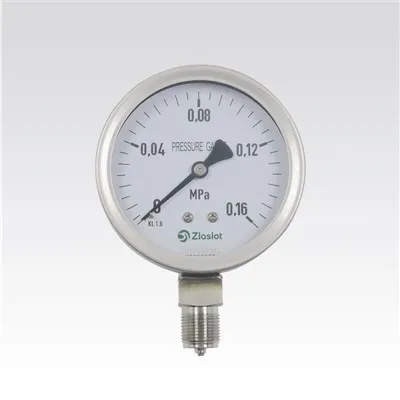
First things first, gather all the necessary tools and materials. You'll need a pressure gauge (we offer a wide range of options like Mechanical Presssure Gauge, Digital Melt Presssure Gauges, and High Temperature Mechanical Melt Presssure Gauges), a wrench (the size depends on the fittings of your gauge and cylinder), Teflon tape, and a safety valve (optional but recommended for added safety).
Step 1: Safety First
Safety should always be your top priority when working with hydraulic systems. Make sure the hydraulic system is completely shut down and depressurized. This means turning off the power source and releasing any built - up pressure in the cylinder. You can do this by slowly opening the relief valve, if there is one, and letting the fluid drain into a suitable container. Wear safety glasses and gloves to protect yourself from any potential splashes or debris.
Step 2: Choose the Right Location
The location where you install the pressure gauge is super important. It should be easily accessible for reading and maintenance. Also, make sure it's in a place where it won't be damaged by moving parts or other equipment. A common location is near the inlet or outlet of the hydraulic cylinder. This way, you can get an accurate reading of the pressure as the fluid enters or leaves the cylinder.
Step 3: Prepare the Fittings
Once you've chosen the location, it's time to prepare the fittings. Start by cleaning the threads on both the pressure gauge and the port on the hydraulic cylinder. Any dirt or debris in the threads can cause leaks or improper installation. After cleaning, wrap Teflon tape around the male threads of the gauge. Make sure to wrap it in the direction of the threads so that it doesn't unwind when you're installing the gauge. Wrap it about 3 - 4 times for a good seal.
Step 4: Install the Pressure Gauge
Now, it's time to install the pressure gauge. Carefully thread the gauge into the port on the hydraulic cylinder by hand. Make sure it's going in straight and not cross - threaded. Once it's hand - tight, use the wrench to give it a final tightening. Be careful not to over - tighten, as this can damage the threads or the gauge itself. A good rule of thumb is to tighten it until it's snug, but you can still feel a little bit of resistance when you try to turn it.
Step 5: Check for Leaks
After installing the pressure gauge, it's crucial to check for leaks. Slowly start the hydraulic system and let the pressure build up. Keep an eye on the gauge and the area around the fittings. If you see any signs of fluid leaking, immediately shut down the system and tighten the fittings a little more. If the leak persists, you might need to remove the gauge, re - wrap the Teflon tape, and reinstall it.
Step 6: Calibrate the Pressure Gauge
Once you've confirmed that there are no leaks, it's time to calibrate the pressure gauge. This ensures that the readings are accurate. You can use a calibration tool or compare the readings with a known - accurate pressure gauge. Follow the manufacturer's instructions for calibration, as the process may vary depending on the type of gauge you're using.
Step 7: Regular Maintenance
Installing the pressure gauge is just the first step. You need to perform regular maintenance to keep it working properly. Check the gauge for any signs of damage or wear, such as a cracked face or a stuck needle. Clean the gauge periodically to remove any dirt or debris that might affect its accuracy. Also, make sure to replace the Teflon tape if it starts to deteriorate.
Why Choose Our Pressure Gauges?
As a pressure gauge supplier, we take pride in offering high - quality products. Our Mechanical Presssure Gauge is reliable and easy to use. It's a great option for those who prefer a traditional, analog gauge. The Digital Melt Presssure Gauges provide accurate digital readings, which are perfect for applications where precision is key. And if you're working in high - temperature environments, our High Temperature Mechanical Melt Presssure Gauges are designed to withstand extreme conditions.
Contact Us for Your Pressure Gauge Needs
If you're in the market for a pressure gauge or have any questions about the installation process, don't hesitate to reach out. We're here to help you find the right product for your specific needs. Whether you're a small business owner or a large industrial operation, we have the expertise and the products to meet your requirements. Contact us today to start a discussion about your pressure gauge needs.
References
- Hydraulic System Handbook: A comprehensive guide to hydraulic systems and components.
- Pressure Gauge Manufacturer's Manuals: These provide detailed information about the installation, operation, and maintenance of specific pressure gauges.