
How do I install a pressure gauge on a filtration system?
Leave a message

Hey there! I'm a supplier of pressure gauges, and today I'm gonna walk you through the process of installing a pressure gauge on a filtration system. Whether you're a DIY enthusiast or a professional in the industry, this guide will help you get the job done right.
Why Install a Pressure Gauge on a Filtration System?
Before we dive into the installation process, let's talk about why you'd want to install a pressure gauge on your filtration system in the first place. A pressure gauge is a crucial tool that allows you to monitor the pressure within the system. By keeping an eye on the pressure, you can detect any issues early on, such as clogs or leaks, and take appropriate action to prevent damage to the system.
Choosing the Right Pressure Gauge
The first step in installing a pressure gauge on a filtration system is choosing the right one for your needs. There are several types of pressure gauges available, each with its own features and benefits. As a pressure gauge supplier, I recommend considering the following factors when making your selection:
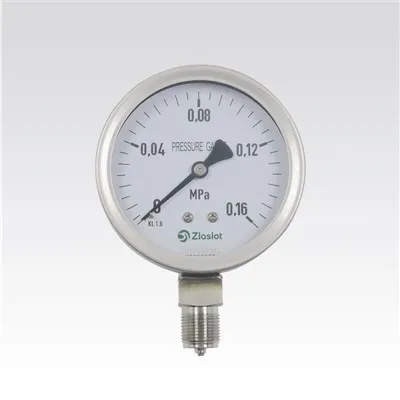
- Type of Pressure Gauge: There are two main types of pressure gauges: mechanical and digital. Mechanical Presssure Gauge are the most common and are typically used for general-purpose applications. They are reliable, easy to read, and relatively inexpensive. Digital pressure gauges, on the other hand, offer more advanced features, such as high accuracy, digital displays, and the ability to connect to a computer or other device for data logging. Digital Melt Presssure Gauges are often used in more specialized applications where precise pressure measurements are required.
- Pressure Range: The pressure range of the gauge should match the operating pressure of your filtration system. Make sure to choose a gauge with a range that is slightly higher than the maximum pressure you expect to encounter to ensure accurate readings.
- Temperature Range: If your filtration system operates at high temperatures, you'll need to choose a pressure gauge that is designed to withstand those conditions. High Temperature Mechanical Melt Presssure Gauges are specifically designed for use in high-temperature applications and are made from materials that can withstand extreme heat.
- Connection Type: The pressure gauge must have the appropriate connection type to fit your filtration system. Common connection types include threaded connections, flanged connections, and quick-connect fittings. Make sure to choose a gauge with the correct connection size and type for your system.
Tools and Materials You'll Need
Once you've chosen the right pressure gauge for your filtration system, it's time to gather the tools and materials you'll need for the installation. Here's a list of the basic tools and materials you'll need:
- Pressure Gauge: The pressure gauge you've selected for your system.
- Wrenches: A set of wrenches to tighten the connections between the pressure gauge and the filtration system.
- Teflon Tape: Teflon tape is used to seal the threaded connections and prevent leaks.
- Pipe Fittings: Depending on the type of connection on your pressure gauge and filtration system, you may need additional pipe fittings to make the connection.
- Safety Glasses and Gloves: It's important to wear safety glasses and gloves to protect yourself from any potential hazards during the installation process.
Installation Steps
Now that you have all the tools and materials you need, it's time to start the installation process. Here are the steps to follow:


- Turn off the Filtration System: Before you begin the installation, make sure to turn off the filtration system and relieve any pressure in the system. This will prevent any accidents or injuries during the installation process.
- Locate the Installation Point: Identify the location where you want to install the pressure gauge on the filtration system. The gauge should be installed in a location where it is easily visible and accessible for reading and maintenance.
- Prepare the Connection: If the connection on the pressure gauge and the filtration system is threaded, wrap the threads with Teflon tape to create a tight seal. Make sure to wrap the tape in the direction of the threads to prevent it from unraveling.
- Install the Pressure Gauge: Carefully thread the pressure gauge onto the connection point on the filtration system. Use a wrench to tighten the connection, but be careful not to over-tighten it, as this can damage the threads or the gauge.
- Check for Leaks: Once the pressure gauge is installed, turn on the filtration system and check for any leaks around the connection point. If you notice any leaks, tighten the connection further or apply additional Teflon tape.
- Calibrate the Pressure Gauge: After the installation is complete, it's important to calibrate the pressure gauge to ensure accurate readings. Follow the manufacturer's instructions for calibrating the gauge, or consult a professional if you're unsure how to do it.
Maintenance and Troubleshooting
Once the pressure gauge is installed and calibrated, it's important to perform regular maintenance to ensure its continued accuracy and reliability. Here are some tips for maintaining your pressure gauge:
- Check the Gauge Regularly: Make it a habit to check the pressure gauge regularly to ensure that it is reading accurately. If you notice any sudden changes in the pressure reading, it could indicate a problem with the filtration system.
- Clean the Gauge: Over time, dirt and debris can accumulate on the pressure gauge, which can affect its accuracy. Use a soft cloth to clean the gauge periodically to keep it clean and free of debris.
- Replace the Gauge if Necessary: If the pressure gauge becomes damaged or stops working properly, it's important to replace it as soon as possible. Continuing to use a faulty gauge can lead to inaccurate readings and potential damage to the filtration system.
If you encounter any problems with your pressure gauge, such as inaccurate readings or leaks, here are some troubleshooting tips:
- Check the Connections: Make sure that all the connections between the pressure gauge and the filtration system are tight and free of leaks. If you notice any loose connections, tighten them using a wrench.
- Check the Gauge for Damage: Inspect the pressure gauge for any signs of damage, such as cracks or dents. If the gauge is damaged, it will need to be replaced.
- Calibrate the Gauge: If the pressure gauge is reading inaccurately, it may need to be calibrated. Follow the manufacturer's instructions for calibrating the gauge, or consult a professional if you're unsure how to do it.
Conclusion
Installing a pressure gauge on a filtration system is a relatively simple process that can provide valuable information about the performance of your system. By choosing the right pressure gauge, following the installation steps carefully, and performing regular maintenance, you can ensure that your pressure gauge provides accurate and reliable readings for years to come.
If you're in the market for a pressure gauge for your filtration system, I'd love to help. As a pressure gauge supplier, I offer a wide range of high-quality pressure gauges to meet your needs. Whether you need a mechanical gauge, a digital gauge, or a high-temperature gauge, I've got you covered. Contact me today to learn more about our products and how we can help you find the right pressure gauge for your system.
References
- Manufacturer's instructions for the pressure gauge
- Industry standards and best practices for pressure gauge installation and maintenance