How to mount a melt pressure gauge on a pipe?
Leave a message
Hey there! I'm from a Melt Pressure Gauges supplier, and today I'm gonna walk you through how to mount a melt pressure gauge on a pipe. It might seem a bit tricky at first, but with the right steps, you'll have it up and running in no time.
Why Mounting a Melt Pressure Gauge Correctly Matters
Before we jump into the actual mounting process, let's talk about why it's so important to mount a melt pressure gauge correctly. A melt pressure gauge is used to measure the pressure of molten materials in pipes, which is crucial for the safety and efficiency of industrial processes. If it's not mounted properly, it won't give accurate readings. And inaccurate readings can lead to all sorts of problems, like equipment damage, production delays, and even safety hazards. So, getting it right from the start is super important.
Tools and Materials You'll Need
First things first, you'll need to gather the necessary tools and materials. Here's what you'll typically need:
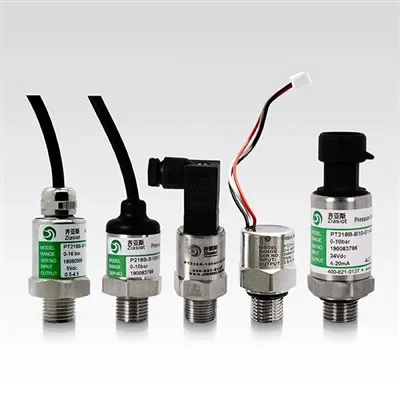
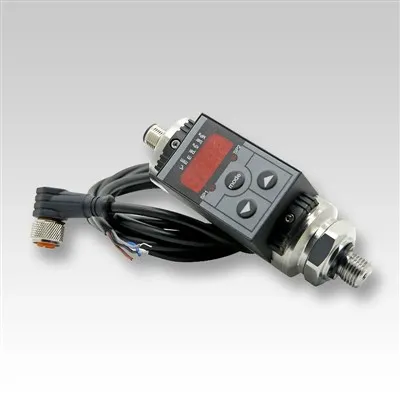
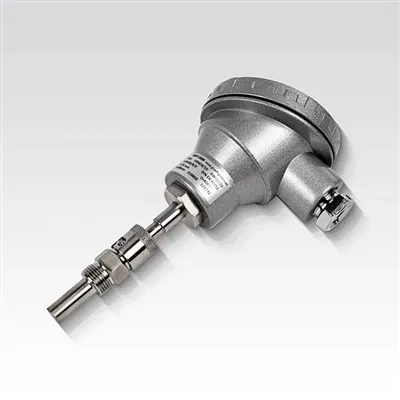
- A melt pressure gauge (obviously). We offer a wide range of melt pressure gauges, including High Temperature Mechanical Melt Presssure Gauges, Mechanical Presssure Gauge, and Vacuum Digital Pressure Gauge.
- A mounting adapter that's compatible with your gauge and the pipe.
- A wrench or a socket set to tighten the connections.
- Teflon tape or a thread sealant to prevent leaks.
- A drill and a drill bit if you need to create a mounting hole in the pipe.
- A level to make sure the gauge is installed straight.
Step 1: Choose the Right Location
The first step in mounting a melt pressure gauge is to choose the right location on the pipe. You want to pick a spot that's easily accessible for maintenance and inspection. Also, it should be away from any sources of vibration or excessive heat that could affect the accuracy of the gauge.
Avoid areas where there are sharp bends or constrictions in the pipe, as these can cause turbulent flow and inaccurate pressure readings. A straight section of the pipe is usually the best choice. Make sure the location is also at a suitable height so that you can easily read the gauge.
Step 2: Prepare the Pipe
Once you've chosen the location, it's time to prepare the pipe. If the pipe already has a pre - drilled hole for the gauge, you'll need to clean it thoroughly to remove any debris, rust, or dirt. You can use a wire brush or a pipe cleaner for this.
If there's no pre - drilled hole, you'll have to drill one. Use a drill bit that's the right size for your mounting adapter. Make sure to drill straight and perpendicular to the pipe surface. After drilling, deburr the edges of the hole to prevent any sharp edges from damaging the gauge or the seal.


Step 3: Apply Thread Sealant
Next, apply a thin layer of Teflon tape or thread sealant to the threads of the mounting adapter. Wrap the Teflon tape around the threads in a clockwise direction, starting from the end. Make sure to cover all the threads evenly. This will help create a tight seal and prevent any leaks.
Step 4: Install the Mounting Adapter
Now, it's time to install the mounting adapter into the hole in the pipe. Use a wrench or a socket set to tighten the adapter securely. But be careful not to over - tighten it, as this can damage the threads or the pipe. You want it to be snug, but not too tight.
Check the level to make sure the adapter is installed straight. If it's not, you can adjust it before proceeding.
Step 5: Attach the Melt Pressure Gauge
Once the mounting adapter is in place, attach the melt pressure gauge to the adapter. Again, use a wrench to tighten the connection. Make sure the gauge is firmly attached, but don't use excessive force.
Step 6: Check for Leaks
After installing the gauge, it's important to check for leaks. You can do this by applying a small amount of soapy water to the connections. If there are any bubbles, it means there's a leak. In that case, you'll need to tighten the connections a bit more or re - apply the thread sealant.
Step 7: Calibrate the Gauge
Before putting the system into operation, you need to calibrate the gauge. This ensures that the gauge is giving accurate pressure readings. Follow the manufacturer's instructions for calibration. Usually, it involves adjusting the zero point and the span of the gauge.
Tips for a Successful Installation
- Always follow the manufacturer's instructions for your specific melt pressure gauge. Different gauges may have slightly different installation requirements.
- If you're not sure about any step of the installation process, don't hesitate to contact our technical support team. We're here to help you out.
- Regularly inspect the gauge and the connections for any signs of wear, damage, or leaks. This will help prevent any problems down the road.
Conclusion
Mounting a melt pressure gauge on a pipe isn't all that complicated if you follow the right steps. By choosing the right location, preparing the pipe properly, using the right tools and materials, and following the installation and calibration procedures, you can ensure that your gauge works accurately and safely.
If you're in the market for a high - quality melt pressure gauge, we've got you covered. We offer a wide range of gauges to suit different applications and requirements. Whether you need a High Temperature Mechanical Melt Presssure Gauges, a Mechanical Presssure Gauge, or a Vacuum Digital Pressure Gauge, we have the perfect solution for you.
If you're interested in purchasing our melt pressure gauges or have any questions about installation, maintenance, or calibration, feel free to reach out to us. We're always happy to have a chat and help you find the best product for your needs. Let's start a conversation and see how we can work together to improve your industrial processes.
References
- Industrial Pressure Gauge Installation Manuals
- Pipe Fitting and Sealing Best Practices Guides