
How to install a temperature switch?
Leave a message

Installing a temperature switch is a task that can seem daunting at first, but with the right guidance and a bit of know - how, it can be accomplished successfully. As a temperature switch supplier, I've had the opportunity to work with various types of temperature switches and help countless customers with their installation needs. In this blog, I'll walk you through the process of installing a temperature switch step by step.
Understanding Temperature Switches
Before we start the installation process, it's essential to understand what a temperature switch is and how it works. A temperature switch is a device that responds to changes in temperature. It can be used to control heating or cooling systems, protect equipment from overheating, or trigger an alarm when a certain temperature threshold is reached.
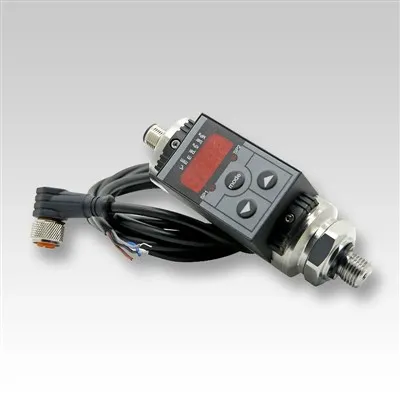
There are different types of temperature switches available in the market. For instance, the Smart Digital Automatic Temperature Switch offers advanced features with its digital interface and automatic operation. The Digital Temperature Switch provides accurate temperature readings and easy - to - use controls, while the Electronic Intellegent Digital Temperature Switch combines intelligence and high - precision sensing capabilities.
Pre - installation Preparation
1. Select the Right Temperature Switch
The first step in the installation process is to choose the appropriate temperature switch for your application. Consider factors such as the temperature range you need to monitor, the type of environment (e.g., industrial, residential), and the electrical requirements. For example, if you're installing a temperature switch in a high - temperature industrial furnace, you'll need a switch that can withstand extreme heat.
2. Gather the Necessary Tools
You'll need a few basic tools for the installation, including a screwdriver (both flat - head and Phillips - head), wire cutters, wire strippers, and a multimeter. The multimeter will be useful for testing the electrical connections and ensuring that the switch is functioning correctly.
3. Read the Manufacturer's Instructions
Every temperature switch comes with a set of instructions provided by the manufacturer. It's crucial to read these instructions thoroughly before starting the installation. The instructions will provide specific details about the installation process, wiring diagrams, and safety precautions.
Installation Steps
1. Power Off
Before you begin any work on the temperature switch, make sure to turn off the power supply to the system. This is a critical safety step that will prevent electrical shocks and damage to the equipment. Locate the circuit breaker or fuse that controls the power to the area where you'll be installing the temperature switch and switch it off.
2. Mount the Temperature Switch
The next step is to mount the temperature switch in the desired location. Choose a spot that is close to the area where you want to monitor the temperature. For example, if you're monitoring the temperature of a water tank, mount the switch on the side of the tank.
Use the appropriate screws and brackets provided with the temperature switch to secure it in place. Make sure that the switch is mounted firmly and level to ensure accurate temperature sensing.
3. Wiring the Temperature Switch
Wiring is one of the most crucial parts of the installation process. Incorrect wiring can lead to malfunctioning of the temperature switch or even pose a safety hazard.
- Identify the Wires: The temperature switch will typically have several wires, including power wires, output wires, and ground wires. Refer to the wiring diagram in the manufacturer's instructions to identify each wire correctly.
- Connect the Power Wires: Connect the power wires of the temperature switch to the appropriate power source. Usually, you'll need to connect the positive and negative wires to the corresponding terminals on the power supply. Use wire strippers to remove a small section of insulation from the wires and then use a screwdriver to tighten the terminal screws.
- Connect the Output Wires: The output wires of the temperature switch are used to control other devices, such as a heater or a fan. Connect these wires to the input terminals of the device you want to control.
- Ground the Switch: Connect the ground wire of the temperature switch to a suitable ground point. This helps to prevent electrical interference and ensures the safety of the system.
4. Check the Connections
Once you've completed the wiring, double - check all the connections to make sure they are secure. Use the multimeter to test the continuity of the wires and ensure that there are no loose connections or short circuits.
5. Power On and Test
After you've verified the connections, turn the power supply back on. Set the temperature threshold on the temperature switch according to your requirements. Then, use a heat source (such as a hair dryer) or a cooling source (such as an ice pack) to change the temperature near the switch.
Observe the behavior of the switch. If the switch is working correctly, it should activate or deactivate at the set temperature threshold. You can also use the multimeter to measure the voltage and current at the output terminals to confirm the proper operation of the switch.
Post - installation Checks
1. Monitor the Temperature Switch
After the installation, monitor the temperature switch for a few hours or days to ensure that it is functioning consistently. Check the temperature readings regularly and make sure that the switch is triggering the appropriate actions (e.g., turning on a heater or a fan) at the correct temperatures.
2. Check for Leaks or Damage
Inspect the area around the temperature switch for any signs of leaks or damage. If you're installing the switch in a liquid - filled system, make sure there are no leaks from the mounting area.
3. Maintenance
Regular maintenance is essential to keep the temperature switch in good working condition. Clean the switch periodically to remove any dust or debris that may accumulate on it. Check the wiring connections from time to time to ensure that they remain secure.
Troubleshooting
If you encounter any problems during or after the installation, here are some common issues and solutions:


1. Switch Not Activating
- Check the Wiring: Make sure that all the wires are connected correctly and that there are no loose connections.
- Verify the Temperature Setting: Check that the temperature threshold is set correctly. You may need to adjust the setting if it's too high or too low.
- Test the Switch: Use a multimeter to test the switch for continuity. If the switch is faulty, it may need to be replaced.
2. False Triggers
- Check for Electrical Interference: Electrical interference can cause false triggers. Make sure that the temperature switch is properly grounded and that there are no nearby electrical devices that may be causing interference.
- Inspect the Environment: Check if there are any sudden temperature changes or drafts in the area that could be triggering the switch.
Contact for Procurement
If you're in the market for a high - quality temperature switch or need further assistance with installation and troubleshooting, we're here to help. As a leading temperature switch supplier, we offer a wide range of products to meet your diverse needs. Whether you need a Smart Digital Automatic Temperature Switch, a Digital Temperature Switch, or an Electronic Intellegent Digital Temperature Switch, we can provide you with the right solution. Contact us to start a procurement discussion and find the best temperature switch for your application.
References
- Various temperature switch manufacturer's instruction manuals
- Electrical installation and safety guidelines from industry standards organizations