How to change the setpoint of a pressure switch?
Leave a message
Pressure switches are crucial components in various industrial and commercial applications, serving to monitor and control pressure levels within a system. As a trusted pressure switch supplier, we understand the importance of ensuring that these devices are set accurately to meet the specific requirements of your operations. In this blog post, we will guide you through the process of changing the setpoint of a pressure switch, providing you with the knowledge and confidence to make adjustments effectively.
Understanding Pressure Switch Setpoints
Before delving into the process of changing the setpoint, it's essential to understand what a setpoint is and why it matters. The setpoint of a pressure switch refers to the specific pressure level at which the switch will activate or deactivate. This activation or deactivation triggers a response in the system, such as starting or stopping a pump, opening or closing a valve, or sending an alarm signal.
Setting the correct setpoint is critical for maintaining the optimal performance and safety of your system. If the setpoint is too high, the system may operate under excessive pressure, leading to potential damage to equipment, leaks, or even catastrophic failure. Conversely, if the setpoint is too low, the system may not function as intended, resulting in inefficient operation or failure to meet the required output.
Types of Pressure Switches
There are several types of pressure switches available, each with its own unique features and applications. The most common types include mechanical pressure switches, electronic pressure switches, and digital pressure switches.


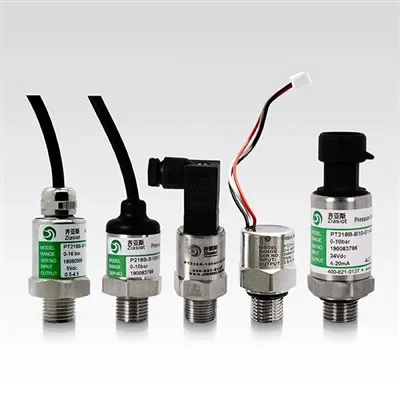
- Mechanical Pressure Switches: These switches use a mechanical mechanism, such as a diaphragm or piston, to detect changes in pressure. When the pressure reaches the setpoint, the mechanical mechanism triggers a switch to open or close an electrical circuit. Mechanical pressure switches are simple, reliable, and cost-effective, making them suitable for a wide range of applications.
- Electronic Pressure Switches: Electronic pressure switches use electronic sensors to detect changes in pressure. These sensors convert the pressure into an electrical signal, which is then processed by an electronic circuit to determine if the setpoint has been reached. Electronic pressure switches offer greater accuracy, flexibility, and control compared to mechanical pressure switches, making them ideal for applications that require precise pressure monitoring and control.
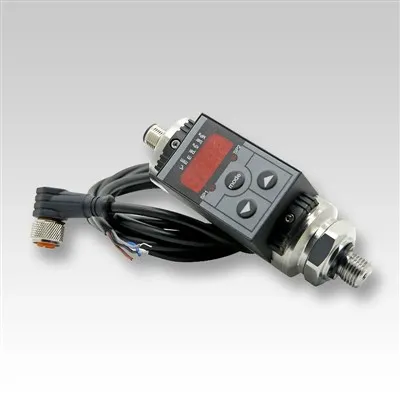
- Digital Pressure Switches: Digital pressure switches are a type of electronic pressure switch that uses a digital display to show the current pressure and setpoint. These switches offer advanced features such as programmable setpoints, hysteresis adjustment, and communication interfaces, making them suitable for complex applications that require precise control and monitoring.
Tools and Equipment Required
Before you begin changing the setpoint of a pressure switch, you will need to gather the necessary tools and equipment. The specific tools and equipment required will depend on the type of pressure switch you are using and the application. However, some common tools and equipment that you may need include:
- Screwdriver: A screwdriver is used to remove the cover of the pressure switch and access the adjustment mechanism.
- Wrench: A wrench is used to loosen and tighten the locknut on the adjustment screw.
- Pressure Gauge: A pressure gauge is used to measure the current pressure in the system and verify the accuracy of the setpoint.
- Multimeter: A multimeter is used to measure the electrical continuity of the switch contacts and ensure that the switch is functioning properly.
Step-by-Step Guide to Changing the Setpoint
Now that you have a basic understanding of pressure switches and the tools and equipment required, let's walk through the step-by-step process of changing the setpoint of a pressure switch.
Step 1: Safety First
Before you begin working on the pressure switch, it's important to ensure that you take the necessary safety precautions. Make sure that the power to the system is turned off and that the pressure in the system is released. Wear appropriate personal protective equipment (PPE), such as gloves and safety glasses, to protect yourself from potential hazards.
Step 2: Locate the Pressure Switch
The first step in changing the setpoint of a pressure switch is to locate the switch in the system. The pressure switch is typically located near the pressure source, such as a pump or compressor. Refer to the system diagram or user manual to locate the pressure switch.
Step 3: Remove the Cover
Once you have located the pressure switch, use a screwdriver to remove the cover of the switch. This will give you access to the adjustment mechanism and the switch contacts.
Step 4: Identify the Adjustment Screw
Inside the pressure switch, you will see an adjustment screw or knob. This screw or knob is used to adjust the setpoint of the switch. Refer to the user manual or the label on the switch to identify the adjustment screw.
Step 5: Loosen the Locknut
Before you can adjust the setpoint, you will need to loosen the locknut on the adjustment screw. Use a wrench to loosen the locknut, but be careful not to over-tighten or damage the screw.
Step 6: Adjust the Setpoint
Once the locknut is loosened, you can adjust the setpoint of the switch. Turn the adjustment screw clockwise to increase the setpoint or counterclockwise to decrease the setpoint. Use a pressure gauge to monitor the pressure in the system and verify the accuracy of the setpoint.
Step 7: Tighten the Locknut
After you have adjusted the setpoint to the desired value, use a wrench to tighten the locknut on the adjustment screw. Make sure that the locknut is tightened securely to prevent the setpoint from changing.
Step 8: Test the Switch
Once you have tightened the locknut, it's important to test the switch to ensure that it is functioning properly. Turn on the power to the system and gradually increase the pressure until the switch activates. Use a multimeter to measure the electrical continuity of the switch contacts and verify that the switch is opening and closing at the correct pressure.
Step 9: Replace the Cover
After you have tested the switch and verified that it is functioning properly, use a screwdriver to replace the cover of the switch. Make sure that the cover is securely fastened to prevent dust, dirt, and moisture from entering the switch.
Tips and Best Practices
Changing the setpoint of a pressure switch can be a complex and challenging task, especially if you are not familiar with the process. Here are some tips and best practices to help you change the setpoint safely and effectively:
- Read the User Manual: Before you begin changing the setpoint of a pressure switch, make sure that you read the user manual carefully. The user manual will provide you with detailed instructions on how to adjust the setpoint and any specific precautions or warnings that you need to follow.
- Use the Right Tools: Make sure that you use the right tools and equipment for the job. Using the wrong tools can damage the switch or cause inaccurate adjustments.
- Take Your Time: Changing the setpoint of a pressure switch requires patience and precision. Take your time and make small adjustments to the setpoint until you achieve the desired value.
- Test the Switch: After you have adjusted the setpoint, it's important to test the switch to ensure that it is functioning properly. Use a pressure gauge and a multimeter to verify the accuracy of the setpoint and the operation of the switch.
- Keep Records: Keep a record of the setpoint adjustments that you make to the pressure switch. This will help you track the performance of the switch over time and make any necessary adjustments in the future.
Conclusion
Changing the setpoint of a pressure switch is an important task that requires careful planning and execution. By following the steps outlined in this blog post and using the tips and best practices provided, you can change the setpoint of a pressure switch safely and effectively. If you have any questions or need further assistance, please don't hesitate to contact us. As a leading pressure switch supplier, we have the expertise and experience to help you find the right pressure switch for your application and provide you with the support and guidance you need to ensure its proper operation.
Contact Us for Procurement
If you are in need of high-quality pressure switches or have any questions about changing setpoints, we invite you to [initiate a procurement discussion]. Our team of experts is ready to assist you in finding the perfect pressure switch solutions for your specific requirements. Whether you need a Hydraulic Pressure Switch, a Smart Digital Pressure Switch, or an Intelligent Water Air Pneumatic Hydraulic Pump Digital Pressure Switch, we have a wide range of products to meet your needs.
References
- Pressure Switch Handbook, Manufacturer's Manual
- Industrial Instrumentation and Control Systems, Textbook