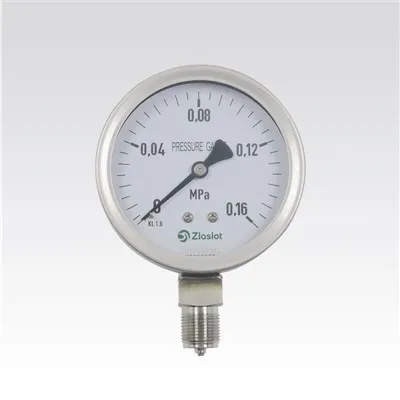

How do I replace a damaged pressure gauge?
Leave a message

Hey there! As a supplier of Pressure Gauges, I've seen my fair share of damaged gauges and the panic that often comes with them. Whether you're a DIY enthusiast or a professional in the industry, knowing how to replace a damaged pressure gauge is a super handy skill. In this blog, I'll walk you through the whole process step by step.
Why Replace a Damaged Pressure Gauge?
First off, you might be wondering why it's so important to replace a damaged pressure gauge right away. Well, a malfunctioning gauge can give you inaccurate readings. This can be a real problem, especially in industrial settings where precise pressure measurements are crucial for safety and efficiency. For example, in a manufacturing plant, if the pressure gauge on a boiler is giving false readings, it could lead to over - pressurization, which is extremely dangerous.
Tools You'll Need
Before you start the replacement process, you need to gather the right tools. Here's a basic list:
- A set of wrenches: Make sure you have the right size for your pressure gauge fittings. Different gauges might require different wrench sizes, so it's a good idea to have a variety on hand.
- A new pressure gauge: You can choose from a wide range of gauges depending on your needs. We offer High Temperature Mechanical Melt Presssure Gauges, Vacuum Digital Pressure Gauge, and Digital Melt Presssure Gauges.
- Teflon tape: This is used to seal the threads of the gauge fitting and prevent leaks.
- Safety goggles and gloves: Safety should always come first! Protect your eyes and hands from any potential debris or chemicals.
Step 1: Shut Down the System
The first and most important step is to shut down the system where the pressure gauge is installed. This could be a hydraulic system, a pneumatic system, or any other equipment that uses pressure. You don't want to be working on a live system, as it can be extremely dangerous. Make sure to follow the proper shutdown procedures for your specific equipment.
Step 2: Release the Pressure
After shutting down the system, you need to release the pressure. Look for a pressure relief valve or a bleed valve on the system. Open it slowly to let the pressure out. You'll hear a hissing sound as the pressure is released. Keep an eye on the pressure gauge (even if it's damaged) to make sure the pressure is dropping. Once the pressure has dropped to zero, you can proceed to the next step.


Step 3: Remove the Old Pressure Gauge
Now it's time to remove the old pressure gauge. Use your wrench to loosen the fitting that connects the gauge to the system. Turn the wrench counter - clockwise. Be careful not to apply too much force, as you don't want to damage the fitting or the surrounding pipes. Once the fitting is loose, you can gently pull the gauge out.
Step 4: Prepare the New Pressure Gauge
Take your new pressure gauge out of its packaging. Check it for any visible damage. Then, wrap the threads of the gauge fitting with Teflon tape. Start at the end of the threads and wrap the tape in a clockwise direction. Make sure to wrap it tightly and evenly, but don't wrap too many layers. Three to four layers should be enough.
Step 5: Install the New Pressure Gauge
Insert the new pressure gauge into the fitting on the system. Use your wrench to tighten the fitting. Turn the wrench clockwise, but don't over - tighten it. You want it to be snug enough to prevent leaks, but not so tight that you damage the threads.
Step 6: Test the System
Once the new pressure gauge is installed, it's time to test the system. Turn on the system and slowly increase the pressure. Keep an eye on the new pressure gauge to make sure it's giving accurate readings. Check for any leaks around the gauge fitting. If you notice any leaks, turn off the system and tighten the fitting a little more.
Troubleshooting
Sometimes, things don't go as smoothly as planned. Here are some common problems you might encounter and how to fix them:
- Inaccurate readings: If the new pressure gauge is giving inaccurate readings, it could be due to a calibration issue. Some gauges need to be calibrated before use. Check the manufacturer's instructions for calibration procedures.
- Leaks: If you notice a leak around the gauge fitting, it could be because the Teflon tape wasn't applied correctly or the fitting wasn't tightened enough. Turn off the system, loosen the fitting, re - apply the Teflon tape, and then tighten the fitting again.
Conclusion
Replacing a damaged pressure gauge isn't as hard as it might seem. By following these steps and taking the necessary safety precautions, you can do it yourself. And if you're in the market for a new pressure gauge, we've got you covered. We offer a wide range of high - quality pressure gauges to meet your needs. Whether you need a gauge for high - temperature applications or a digital gauge for precise measurements, we have the right product for you.
If you're interested in purchasing pressure gauges or have any questions about the replacement process, feel free to reach out to us. We're here to help you find the best solution for your pressure measurement needs.
References
- General knowledge of pressure gauge installation and maintenance from industry experience.
- Manufacturer's instructions for pressure gauges.