How do I install a pressure gauge on a heat exchanger?
Leave a message
Installing a pressure gauge on a heat exchanger is a crucial task that ensures the efficient and safe operation of the system. As a pressure gauges supplier, I've witnessed firsthand the importance of proper installation and the impact it can have on the performance of heat exchangers. In this blog post, I'll guide you through the process of installing a pressure gauge on a heat exchanger, from choosing the right gauge to the final steps of installation.
Choosing the Right Pressure Gauge
The first step in installing a pressure gauge on a heat exchanger is selecting the appropriate gauge for the job. There are several types of pressure gauges available in the market, each designed for specific applications and operating conditions. Here are some common types of pressure gauges that you might consider:
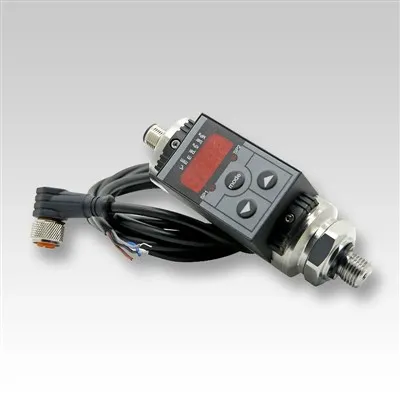
- Vacuum Digital Pressure Gauge: These gauges are ideal for measuring low-pressure and vacuum conditions. They offer high accuracy and digital display, making it easy to read the pressure readings.
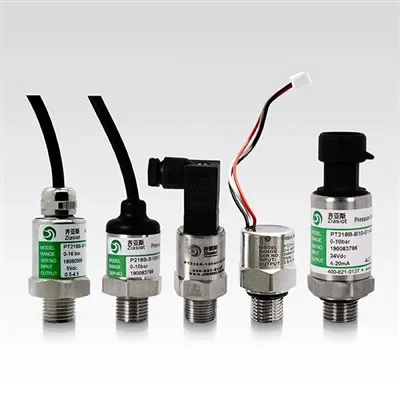
- Mechanical Presssure Gauge: Mechanical pressure gauges are widely used in various industrial applications. They are reliable, durable, and can withstand harsh environments.
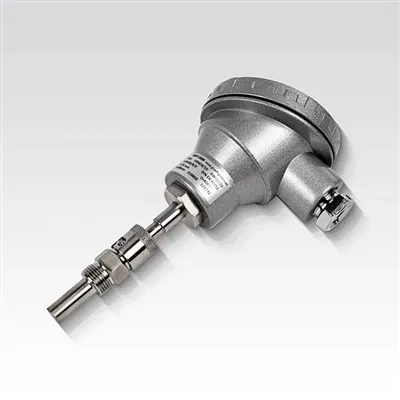
- High Temperature Mechanical Melt Presssure Gauges: If your heat exchanger operates at high temperatures, these gauges are the best choice. They are specifically designed to measure pressure in high-temperature environments.
When choosing a pressure gauge, consider the following factors:
- Pressure Range: Determine the maximum and minimum pressure that the gauge needs to measure. Choose a gauge with a pressure range that slightly exceeds the expected pressure in the heat exchanger.
- Accuracy: The accuracy of the pressure gauge is crucial for ensuring the safe and efficient operation of the heat exchanger. Choose a gauge with an accuracy level that meets your requirements.
- Temperature and Chemical Compatibility: Consider the operating temperature and the type of chemicals present in the heat exchanger. Choose a gauge that is compatible with the temperature and chemical conditions.
- Mounting Style: There are different mounting styles available for pressure gauges, such as panel mount, surface mount, and direct mount. Choose a mounting style that is suitable for your heat exchanger.
Preparing for Installation
Once you have chosen the right pressure gauge, it's time to prepare for the installation. Here are the steps you need to follow:
- Gather the Necessary Tools: You will need a few tools for the installation, including a wrench, a pipe cutter, a thread sealant, and a drill (if necessary).
- Shut Down the Heat Exchanger: Before starting the installation, make sure to shut down the heat exchanger and isolate it from the power source. This will prevent any accidents or injuries during the installation process.
- Locate the Installation Point: Identify the location where you want to install the pressure gauge. The installation point should be easily accessible and away from any moving parts or hot surfaces.
- Clean the Installation Area: Use a clean cloth to wipe the installation area and remove any dirt, debris, or oil. This will ensure a proper seal between the pressure gauge and the heat exchanger.
Installing the Pressure Gauge
Now that you have prepared for the installation, it's time to install the pressure gauge on the heat exchanger. Here are the steps you need to follow:
- Cut the Pipe (if necessary): If the installation point requires a new pipe connection, use a pipe cutter to cut the pipe to the appropriate length. Make sure to clean the cut ends of the pipe to remove any burrs or sharp edges.
- Apply Thread Sealant: Apply a thin layer of thread sealant to the threads of the pressure gauge and the pipe connection. This will prevent any leaks and ensure a tight seal.
- Install the Pressure Gauge: Carefully thread the pressure gauge into the pipe connection and tighten it using a wrench. Make sure not to over-tighten the gauge, as this can damage the threads or the gauge itself.
- Connect the Pressure Gauge to the Heat Exchanger: If the pressure gauge requires a connection to the heat exchanger, use a suitable fitting or adapter to connect the gauge to the heat exchanger. Make sure to tighten the connection securely to prevent any leaks.
- Test the Installation: Once the pressure gauge is installed, turn on the heat exchanger and check for any leaks. If you notice any leaks, tighten the connections or apply more thread sealant as needed.
Calibrating the Pressure Gauge
After installing the pressure gauge, it's important to calibrate it to ensure accurate pressure readings. Here are the steps you need to follow:


- Refer to the Manufacturer's Instructions: The manufacturer's instructions will provide you with the specific calibration procedure for your pressure gauge. Make sure to follow these instructions carefully.
- Use a Calibration Device: You will need a calibration device, such as a pressure calibrator, to calibrate the pressure gauge. Connect the calibration device to the pressure gauge and follow the calibration procedure provided by the manufacturer.
- Adjust the Pressure Gauge: If the pressure gauge readings are not accurate, adjust the gauge according to the calibration device readings. Make small adjustments and recheck the readings until the gauge is calibrated correctly.
Maintenance and Troubleshooting
To ensure the long-term performance and accuracy of the pressure gauge, it's important to perform regular maintenance and troubleshooting. Here are some tips:
- Inspect the Pressure Gauge Regularly: Check the pressure gauge for any signs of damage, such as cracks, leaks, or loose connections. If you notice any issues, replace the gauge or repair the connection as soon as possible.
- Clean the Pressure Gauge: Use a clean cloth to wipe the pressure gauge regularly to remove any dirt, debris, or oil. This will prevent any blockages or damage to the gauge.
- Check the Calibration Periodically: Over time, the pressure gauge may lose its accuracy. Check the calibration of the gauge periodically and recalibrate it if necessary.
- Troubleshoot Any Issues: If you notice any abnormal pressure readings or other issues with the pressure gauge, troubleshoot the problem immediately. Check the connections, the calibration, and the gauge itself for any issues.
Conclusion
Installing a pressure gauge on a heat exchanger is a relatively simple process, but it requires careful planning and attention to detail. By choosing the right pressure gauge, preparing for the installation, installing the gauge correctly, calibrating it accurately, and performing regular maintenance and troubleshooting, you can ensure the efficient and safe operation of your heat exchanger.
If you have any questions or need further assistance with pressure gauge installation or selection, please don't hesitate to contact us. We are a leading pressure gauges supplier and can provide you with high-quality products and expert advice. Our team of professionals is ready to help you find the right solution for your heat exchanger application.
References
- ASME Boiler and Pressure Vessel Code
- Instrument Society of America (ISA) Standards
- Manufacturer's manuals for pressure gauges and heat exchangers