How to install an electromagnetic flowmeter in a vertical pipe?
Leave a message
Hey there! As a supplier of electromagnetic flowmeters, I often get asked about the best way to install these nifty devices, especially in vertical pipes. It's a crucial topic because a proper installation can make all the difference in getting accurate and reliable flow measurements. So, let's dive right in and explore how to install an electromagnetic flowmeter in a vertical pipe step by step.
Why Install in a Vertical Pipe?
First off, you might be wondering why someone would want to install a flowmeter in a vertical pipe. Well, there are a few good reasons. In some industrial setups, vertical pipes are just the reality of the layout. Maybe there's limited space on the horizontal runs, or perhaps the fluid flow itself is better managed vertically. Also, in certain processes, installing the flowmeter vertically can prevent issues like air pockets that could affect measurement accuracy in horizontal pipes.
Pre - installation Checks
Before you even start thinking about getting your hands dirty with the installation, there are a few checks you need to do.
Pipe Condition
The first thing is to examine the vertical pipe. Make sure it's in good condition, free from any major dents, cracks, or corrosion. A damaged pipe can lead to leaks around the flowmeter, which is a big no - no. You should also measure the inner diameter of the pipe accurately. This is important because the flowmeter needs to fit snugly, and the measurement data is often calibrated based on the pipe size.
Fluid Compatibility
Check if the fluid flowing through the pipe is compatible with the electromagnetic flowmeter. Most electromagnetic flowmeters work well with conductive fluids, but you need to confirm the specific conductivity range of your fluid. If the fluid is not conductive enough, the flowmeter might not work as expected. Also, look out for any abrasive or corrosive properties of the fluid that could damage the flowmeter over time.
Choosing the Right Location
Selecting the right location in the vertical pipe for the flowmeter is crucial.
Avoiding Turbulence
You want to avoid areas with high turbulence. Turbulence can cause inaccurate readings because it disrupts the smooth flow of the fluid. That means staying away from elbows, valves, and pumps. Try to have a straight section of pipe upstream and downstream of the flowmeter. A good rule of thumb is to have at least 5 - 10 pipe diameters of straight pipe upstream and 2 - 3 pipe diameters downstream.
Accessibility
Think about accessibility for maintenance and calibration. You don't want to install the flowmeter in a spot that's impossible to reach when you need to do some checks or adjustments. Make sure there's enough space around the flowmeter to work, and consider the height as well. You don't want to be climbing a precarious ladder every time you need to look at it.
Installation Steps
Step 1: Shut Down the System
Safety first! Before you start any installation work, shut down the fluid system. This stops the flow of fluid and reduces the risk of leaks or accidents. It also gives you a stable environment to work in.
Step 2: Clean the Pipe
Once the system is shut down, clean the inside of the vertical pipe where the flowmeter will be installed. Remove any debris, dirt, or scale that could interfere with the installation or the performance of the flowmeter. You can use a pipe brush or a cleaning solution if necessary.
Step 3: Mark the Installation Location
According to your pre - determined location, mark the spots on the pipe where the flowmeter will be placed. Make sure the markings are straight and accurate. This will ensure that the flowmeter is installed in the right position.
Step 4: Cut the Pipe (if necessary)
In some cases, you might need to cut the vertical pipe to fit the flowmeter. Use a proper pipe - cutting tool and make clean, straight cuts. Be careful during this process to avoid any pipe deformation.
Step 5: Install the Gaskets
Place the gaskets on both ends of the flowmeter. Gaskets are important for creating a tight seal and preventing leaks. Make sure the gaskets are the right size and material for your application.
Step 6: Insert the Flowmeter
Carefully insert the flowmeter into the pipe at the marked location. Align it properly with the pipe so that the fluid can flow through it smoothly. You might need some assistance to hold the flowmeter in place during this step.
Step 7: Bolt the Flanges
If your flowmeter has flanges, bolt them to the pipe flanges securely. Use the right torque settings for the bolts. Over - tightening can damage the flanges, while under - tightening can lead to leaks.
Step 8: Connect the Wiring
Connect the electrical wiring of the flowmeter according to the manufacturer's instructions. This includes connecting the power supply, signal output, and any other necessary connections. Make sure all the connections are tight and properly insulated to prevent electrical issues.
Post - installation Checks
After the installation is complete, there are a few checks you should do before you start the system again.
Leak Test
Perform a leak test around the flowmeter and all the connections. You can use a leak - detection solution or simply observe for any signs of fluid seepage. If you find any leaks, tighten the connections or replace the gaskets as needed.


Calibration
Calibrate the flowmeter to ensure accurate measurements. You can use a calibration device or follow the calibration procedure provided by the manufacturer. Calibration is important because it compensates for any small variations in the installation or the flow conditions.
Other Flowmeter Options
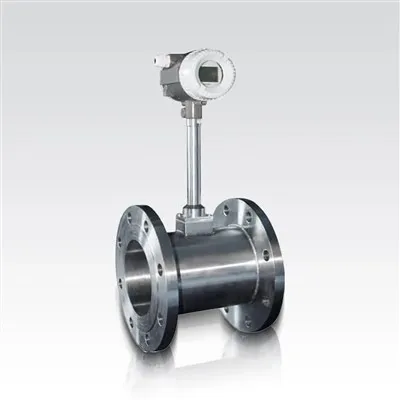
While electromagnetic flowmeters are great, there are other types of flowmeters available too. For example, the Vortex Flowmeter is another option. It works based on the principle of vortex shedding and is suitable for a wide range of fluids. The LDG Electromagnetic Flowmeter is a specific model of electromagnetic flowmeter that we offer, known for its high accuracy and reliability. And if you're dealing with small - scale applications, the Turbine Flow Meter could be a good choice.
Contact for Purchase and Consultation
If you're interested in purchasing an electromagnetic flowmeter or need more information on installation and selection, we're here to help. Our team of experts can provide you with detailed advice and support. Whether you're a small - scale business or a large industrial facility, we have the right flowmeter solution for you.
References
- "Flow Measurement Handbook" by Richard W. Miller
- Manufacturer's installation manuals for electromagnetic flowmeters