
How to install a melt pressure indicator?
Leave a message

Installing a melt pressure indicator is a crucial step in ensuring the efficient and safe operation of various industrial processes, especially those involving the processing of molten materials. As a trusted supplier of melt pressure indicators, we understand the importance of a proper installation. In this blog, we'll guide you through the process of installing a melt pressure indicator, from preparation to the final checks.
Pre - installation Preparation
Before you start the installation process, it's essential to gather all the necessary tools and equipment. You'll typically need a wrench, a screwdriver, a multimeter for electrical checks, and a mounting bracket if it's not already included with the indicator.
It's also important to choose the right location for the melt pressure indicator. The location should be easily accessible for monitoring and maintenance, away from excessive heat sources other than the molten material itself, and protected from physical damage. Additionally, ensure that the area has proper ventilation to prevent the build - up of any harmful fumes.
Selecting the Right Melt Pressure Indicator
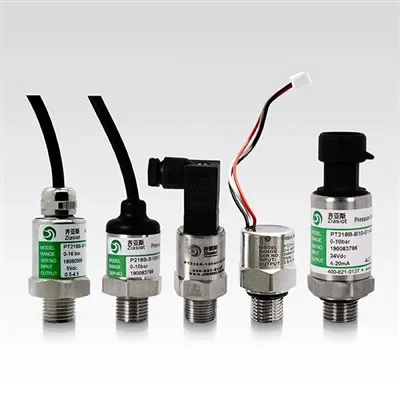
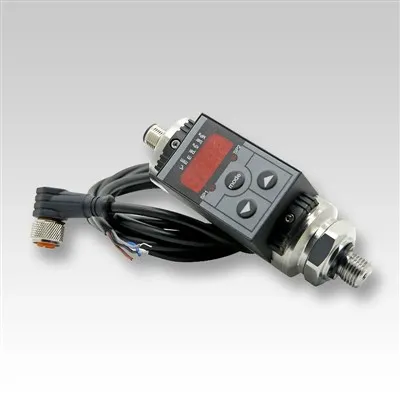
As a supplier, we offer a wide range of melt pressure indicators to suit different industrial needs. For example, our Melt Pressure Indicator is an intelligent digital pressure indicator that provides accurate and reliable pressure readings. It features advanced technology and a user - friendly interface, making it suitable for various applications.
If you're working in a homogenization process, our Homogenizer Digital Pressure Gauge is an excellent choice. It is specifically designed to meet the pressure measurement requirements of homogenizers, ensuring precise control of the process.
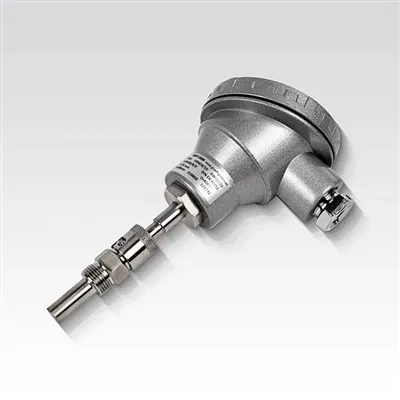
For applications where both pressure and temperature monitoring are necessary, our Pressure Temperature Indicator is the ideal solution. It can simultaneously measure and display pressure and temperature, providing comprehensive data for better process control.
Mounting the Melt Pressure Indicator
The first step in the installation is to mount the indicator. If you're using a mounting bracket, attach it securely to a stable surface. Make sure the bracket is level and firmly fixed to prevent any vibrations that could affect the accuracy of the readings.
Once the bracket is in place, carefully place the melt pressure indicator on the bracket. Align the holes on the indicator with the holes on the bracket and insert the screws. Tighten the screws evenly to ensure a secure fit. Avoid over - tightening the screws, as this could damage the indicator or the bracket.


Connecting the Pressure Sensor
The melt pressure indicator is connected to a pressure sensor, which is usually installed in the process where the pressure needs to be measured. First, identify the pressure port on the indicator. It is typically labeled clearly.
Next, connect the pressure sensor to the pressure port using a suitable pressure - rated tube or cable. Make sure the connection is tight and leak - free. You can use a wrench to gently tighten the fittings, but be careful not to overtighten and damage the threads.
Electrical Connections
Proper electrical connections are vital for the operation of the melt pressure indicator. Start by identifying the power supply requirements of the indicator. This information is usually provided in the user manual.
Connect the power cable to the appropriate power source. Ensure that the voltage and current ratings of the power source match the requirements of the indicator. Use a multimeter to check the voltage at the power input terminals of the indicator before making the connection.
In addition to the power connection, you may also need to connect other electrical components such as signal cables for data transmission. Follow the wiring diagram provided in the user manual to make these connections accurately. Make sure all the connections are secure and insulated to prevent any electrical hazards.
Calibration
After the installation and electrical connections are complete, the next step is to calibrate the melt pressure indicator. Calibration ensures that the indicator provides accurate pressure readings.
Most modern melt pressure indicators come with built - in calibration functions. You can follow the calibration procedure outlined in the user manual. This usually involves applying a known pressure to the sensor and adjusting the indicator settings to match the known pressure value.
It's recommended to use a calibrated pressure source for calibration. This could be a deadweight tester or a calibrated pressure gauge. Take multiple readings at different pressure levels to ensure the accuracy of the calibration across the entire measurement range.
Testing and Final Checks
Once the calibration is complete, it's time to test the melt pressure indicator. Start the process where the pressure is being measured and observe the indicator readings. Compare the readings with other reliable pressure measurement devices in the system to ensure consistency.
Check for any signs of leaks at the pressure connections. A small leak can affect the accuracy of the pressure readings and may also pose a safety risk. Look for any abnormal vibrations or noises from the indicator, which could indicate a problem with the mounting or internal components.
Verify that all the electrical connections are working properly. Check the display of the indicator for any error messages. If you encounter any issues during the testing, refer to the troubleshooting section of the user manual or contact our technical support team.
Maintenance and Long - term Operation
To ensure the long - term reliability and accuracy of the melt pressure indicator, regular maintenance is required. This includes cleaning the indicator periodically to remove any dust or debris that may accumulate on the surface.
Inspect the pressure connections and electrical connections regularly for signs of wear or damage. Replace any worn - out components promptly. Check the calibration of the indicator at regular intervals to ensure that it continues to provide accurate readings.
Conclusion
Installing a melt pressure indicator is a process that requires careful planning, proper installation techniques, and thorough testing. By following the steps outlined in this blog, you can ensure a successful installation and reliable operation of your melt pressure indicator.
As a leading supplier of melt pressure indicators, we are committed to providing high - quality products and excellent customer service. If you have any questions about the installation process, or if you're interested in purchasing a melt pressure indicator, please feel free to contact us. Our experienced sales team is ready to assist you with your procurement needs and answer any technical questions you may have.
References
- Manufacturer's user manuals for melt pressure indicators
- Industry standards for pressure measurement and installation